
I’ve jumped onto the “weighted vest” bandwagon and love it!
As a post-menopausal woman (yep, it feels as bad to write it as it does to read it), I now approach my workouts a little bit differently. Cue the heavier weights, add speed intervals to my runs, and try to get a bigger bang out of my walks.
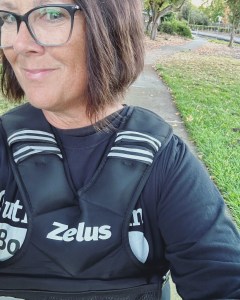
So, after researching and checking in with friends already using weighted vests, I took the plunge and purchased one with a starting weight of 11 lbs and has pockets to add small 1-lb bags, increasing its total weight to 20 lbs.
I wear it two or three times a week for my 30-minute power walk. I go at a good clip and keep the route relatively flat-ish. I’m not ready to start climbing trails or doing heavy hills. Yet.
I have also started wearing it during my 5-15 minute cool-down walks after I run. I am sure some people actually wear them during their runs, but personally, I find that barbaric.
There are many benefits to wearing a weighted vest.
- Increased Calorie Burn: Carrying extra weight during your walk increases the intensity of the exercise, leading to a higher calorie burn.
- Strengthened Muscles: By introducing resistance, you’re engaging more muscle groups. This not only strengthens your muscles but also improves endurance over time.
- Improved Cardiovascular Health: Adding weight makes your heart work harder, enhancing cardiovascular health.
- Boosted Bone Density: The added pressure on your bones from carrying extra weight can enhance bone density, reducing the risk of osteoporosis.
- Enhanced Balance and Stability: Walking while wearing a weighted vest can improve your balance and stability, which is especially beneficial as we age.
Here are some tips to add a weighted vest to your fitness program.
- Start Small – Take a 10-minute walk a few times a week to get used to the added load.
- Start Light—I like the flexibility of having a weighted vest where you can add (or subtract) weight. The 11-lb starting point was a good option; frankly, it will take me many weeks before I start adding those 1-lb bags!
- Start with DIY – If you don’t want to invest in any equipment, try “rucking.” Rucking is where you load up a backpack with weighted objects. A bag of flour in your backpack will add load without weighing you down. Just strap it on tightly so it doesn’t bounce.
- Start Flat – Save the hills and trails until you’re comfortable with the added weight.
- Start Noticing – How do your knees, shoulders, ankles, and feet feel with the added load? Adjust your distance and/or weight accordingly.
If you’re interested in the weighted vest I have, click here to buy your own.
Now go run!
Keli 🙂
